Neem plant care in pots, With astonishing recuperating characteristics and versatility, the neem plant is a brilliant expansion to any garden. Creating neem in pots is uncommonly useful for those living in metropolitan networks or conditions that aren’t perfect for prosperity. This blog expects to give an exhaustive manual for developing Neem plants in pots, from choosing the fitting holder to controlling irritations and illnesses. Neem plant scientific name is Azadirachta indica.
The most effective method to Choose the Right Pot:
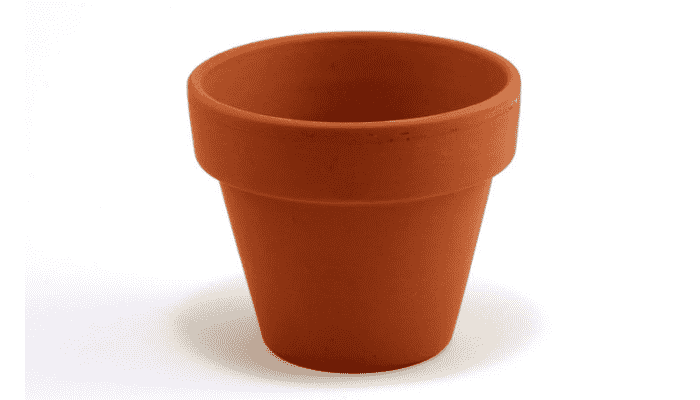
The principal stage in growing a sound Neem plant is picking the right pot. Neem plants might develop to be incredibly enormous, subsequently, it’s vital to pick a pot with a very sizable amount of space for the roots to develop. Here are a few centres to think about next: Start with a pot that is around eighteen creeps deep and wide. As the plant grows, you might need to transfer it to a bigger container.
Clay pots are the ideal material since they allow more air to reach the roots. Conversely, plastic pots are easier to handle and lightweight. Drainage: To avoid waterlogging and root rot, make sure the pot has an adequate number of drainage holes.
Soil Readiness Neem plants flourish in well-depleting, sandy soil with a conceivably acidic to unbiased pH (6.0 to 7.5). Components:
Mix equal amounts of garden soil, sand, and compost or well-rotted manure to create the ideal soil mix. Great supplements and seepage are given by this mix. pH Level: Utilizing a dirt testing pack, measure the pH of the dirt. Lime can be utilized to raise the pH assuming it is excessively low (acidic). One can use peat moss. Cleaning: The farmer must sterilise the dirt to prevent soil-borne illnesses by either roasting it on a grill for 30 minutes at 180°F (82°C) or by putting it in plastic bags and letting it sit outside in the sun for a half-month. To buy Garden soil mix click here.

Neem seedling planting:
After the pot and soil are suitable, the neem seedling should be planted. Growing neem is best done in the mild conditions of late winter. Establishing Profundity: Make an opening in the pot that is sufficiently large to hold the seedling’s root ball and has establishing profundity. Ensure that the root collar—the area where the stem meets the roots—is level with the dirt surface before placing the seedling in the opening and covering it with soil. Watering: Water the seedling right after planting to help with settling the soil around the roots.
How to grow neem plant?
Two to three seeds are placed together about 1 cm deep in loose soil. After germination, only the strongest plant should be retained. When planting a large number, it is advisable to cultivate young plants first in pots, trays or plastic bags. After 3 months, they should be transplanted into the ground.

Preparing for watering and fertilizing Your neem plant growth and health are dependent on providing it with the right amount of water and nutrients:
Watering: Neem plants can endure a dry spell, yet they should be watered habitually during their most memorable development stage. Water thoroughly when the top inch of the soil appears dry. The plant goes into torpidity throughout the colder time of year, so it needs less water. Feed your Neem plant every three months with a balanced, slow-release fertilizer during the growing season (spring and summer). Regular decisions like manure tea or fish emulsion can moreover give key enhancements.

Temperature and neem tree light requirements the sun and need a lot of light to thrive:
Sunlight: Position the pot so that the plant receives at least six to eight hours of direct sunlight per day. Use a developed light to enhance regular light while developing inside.
Temperature: Neem plants favour warm temperatures between 70°F to 90°F (21°C to 32°C). They should be protected from frost despite their ability to withstand temperatures as low as 40°F (4°C).

Pruning and Education Standard:
Pruning supports healthy development and keeps up with the Neem plant’s state:
Pruning: Prune the plant in pre-spring to dispose of dead or undesirable branches and to shape the haven. Make precise cuts with pruning shears that are razor-sharp.
How to prune neem plant?
When removing larger branches, make a series of cuts to prevent bark tearing. Start with a notch cut on the underside of the branch, then make a second cut further out to remove the bulk of the branch, and finally a final cut just outside the branch collar.
Preparing: To energize stretching and give your plant a bushier appearance, squeeze back the tips of the new development. Centre around eliminating the lower branches to make a tree-like shape.

Neem tree pests and diseases Management is generally resistant to disease and pests, but they can still be affected by the following common issues:
Bothers: Whiteflies, aphids, and bug vermin are normal nuisances. To typically repel these insects, take a shower infused with neem oil. Mix 2 tablespoons of neem oil with 1 gallon of water and several drops of dish chemical, then, shower the plant.
Infections: Fine mould and root decay are possible issues. Ensure extraordinary waste and avoid overwatering to prevent root rot. For fine buildup, if fundamental, apply a fungicide and increment air dissemination around the plant.

Gathering Neem Things The bark, seeds, and leaves of the neem can be in every way collected for various purposes:
Neem tree leaves benefits: Select mature leaves for use in neem tea, powder, or concentrates depending on the situation. For some time later, leaves can be dried and put away. Neem preparations are reportedly efficacious against a variety of skin diseases, septic sores, and infected burns. The leaves, applied in the form of poultices or decoctions, are also recommended for boils, ulcers, and eczema. The oil is used for skin diseases such as scrofula, indolent ulcers, and ringworm.

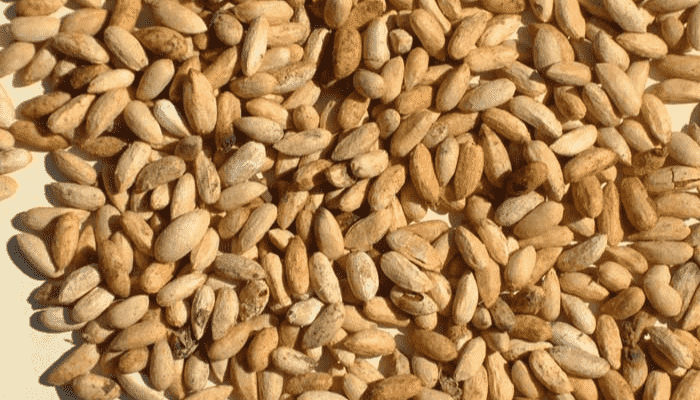
Neem tree seeds benefits: Neem seeds are generally accumulated in pre-tumble to late summer. Assemble fallen seeds, take out the pound, and dry the seeds before eliminating oil or laying out new seedlings. People use neem for lice, tooth plaque, gingivitis, psoriasis, to repel insects, and for many other purposes, but there is no good scientific evidence to support most of these uses. There is also no good evidence to support using neem for COVID-19. Neem seed oil is used as a pesticide.
Neem tree bark uses: For restorative purposes, mature branches can be collected for their bark. Be careful not to cause too much damage to the plant when removing the bark. Neem contains chemicals that might help reduce blood sugar levels, heal ulcers in the digestive tract, prevent pregnancy, kill bacteria, and prevent plaque from forming in the mouth.

Normal Issues to Fix Here are a couple of ordinary issues you could insight into and how to address them:
Yellowing Leaves: This could be caused by too much water, too little nutrients, or too little sunlight. Change the way the plant gets watered, treat it right, and make sure it gets enough light.

Shrivelling: Underwatering, excessive watering, or root decay can all result in shrinkage. Based on the moisture content and drainage, alter the amount of water given to the soil. Unfortunate soil, lacking light, or vermin invasions might cause hindered development. Make sure there is enough light, check the soil for quality, and look for pests.
Winter Care Neem plants are sensitive to cold and need phenomenal thought during winter:
Inside: If you live in a region with harsh winters, bring the plant inside before the first ice forms. Make sure it gets plenty of sun and don’t overwater it. When it gets cold outside, mulch the base of outdoor plants in milder climates and cover them with a frost cloth.
Cuttings or seeds can be used to propagate neem plants:
Seeds: Soak the mature Neem tree seeds in water for 24 hours before planting them in a mix designed for starting seeds. Keep the soil warm and moist until germination, which can take anywhere from one to three weeks.
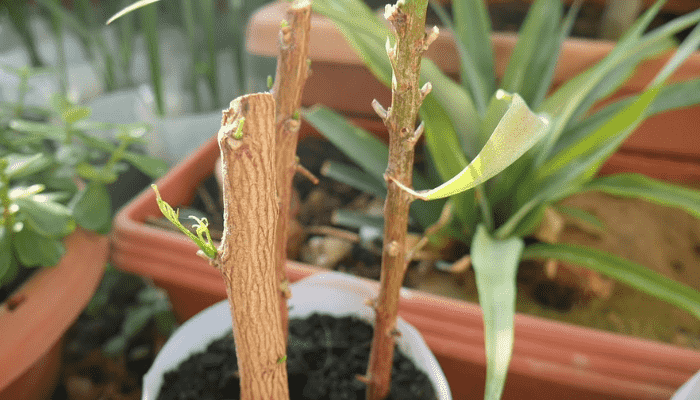
Cuttings: Take a 6- to 8-inch cutting from a solid branch, remove the lower leaves, and soak the cut end to establish an agent. Cover the cutting with a plastic bag and place it in a pot filled with moist soil to keep it humid. Fog it often until establishes structure in a warm, radiant area.
Benefits of Growing neem in pots saves space and it is an excellent choice for balconies, miniature gardens, and indoor spaces:
Mobility: The plant can be given more sunlight and protection from the elements by moving its pots.
Trouble Control: More clear to screen and direct disturbances and diseases in a controlled environment.

Conclusion:
Growing Neem in pots is a satisfying activity that combines the enjoyment of gardening with the benefits of having a potent medicinal plant. By following the advice in this blog, you can ensure that your Neem plant grows well and continues to provide its numerous benefits for many years to come. Whether you’re using Neem leaves for customary fixes, removing oil from its seeds, or participating in its presence in your home, this adaptable plant is a huge extension to any janitor’s combination.

