Hollyhock Seeds
- Brand: Plantozia
₹35.00₹100.00 (-65%)
10 in stock
- Packet contain: 1-Pack Seeds.
- Sowing season: Mid-summer to early fall.
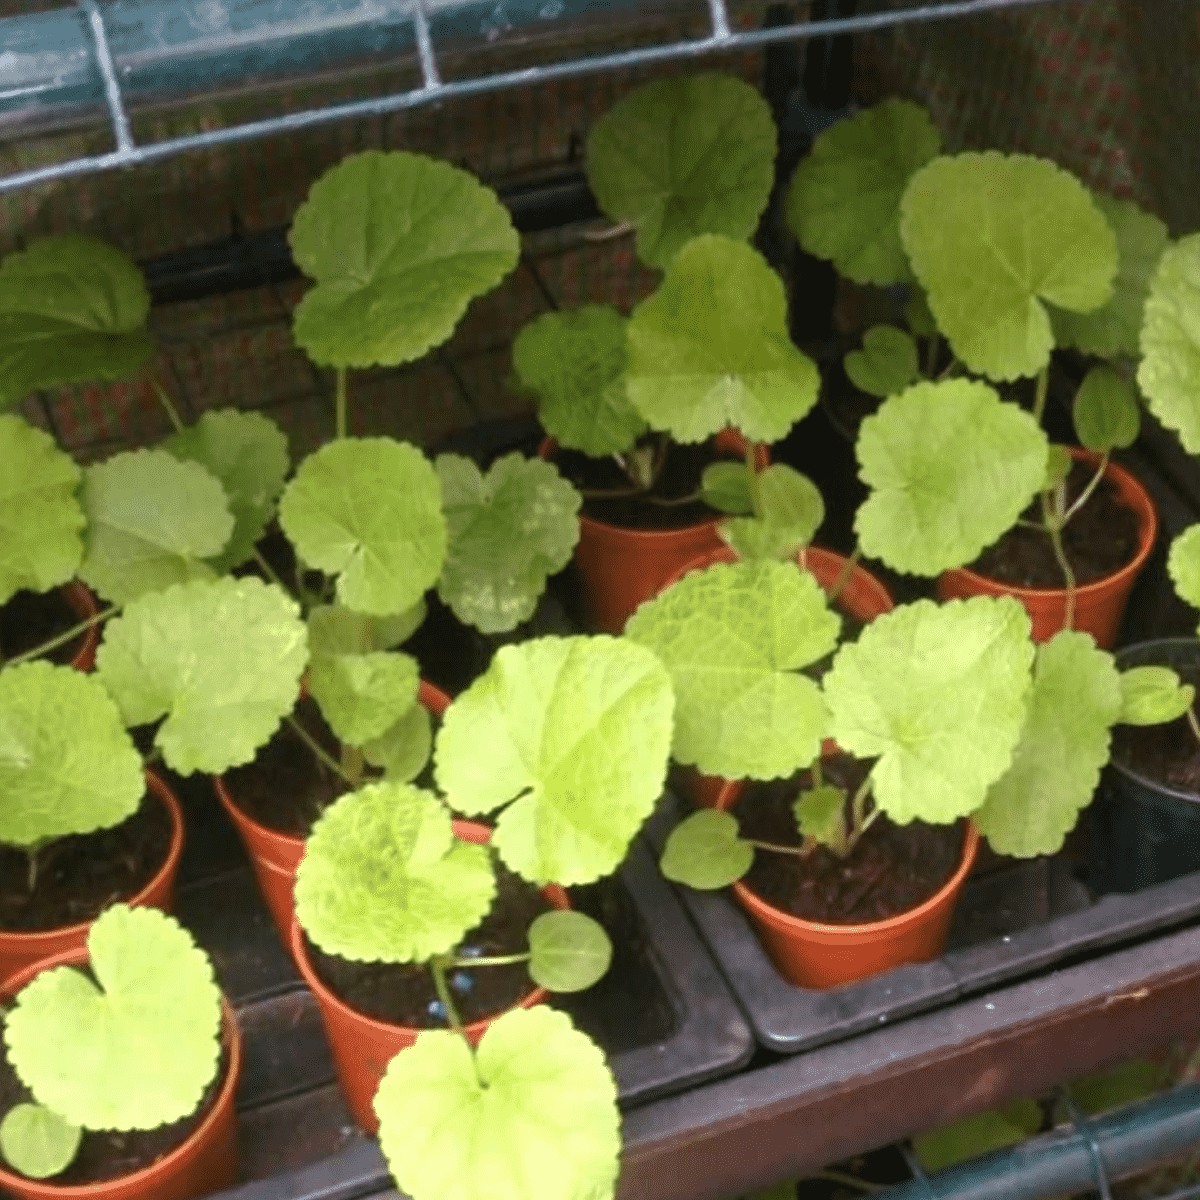
- Mode of showing: Show the seeds 0.5 cm deep in a seeding tray / container / pots. Transplant in 7-14 days.
- Germination Time: 7 to 21 days from showing.
- Harvesting: Hollyhock Seeds 120-150 days after transplanting.
HOLLYHOCK SEEDS GERMINATION PROCESS
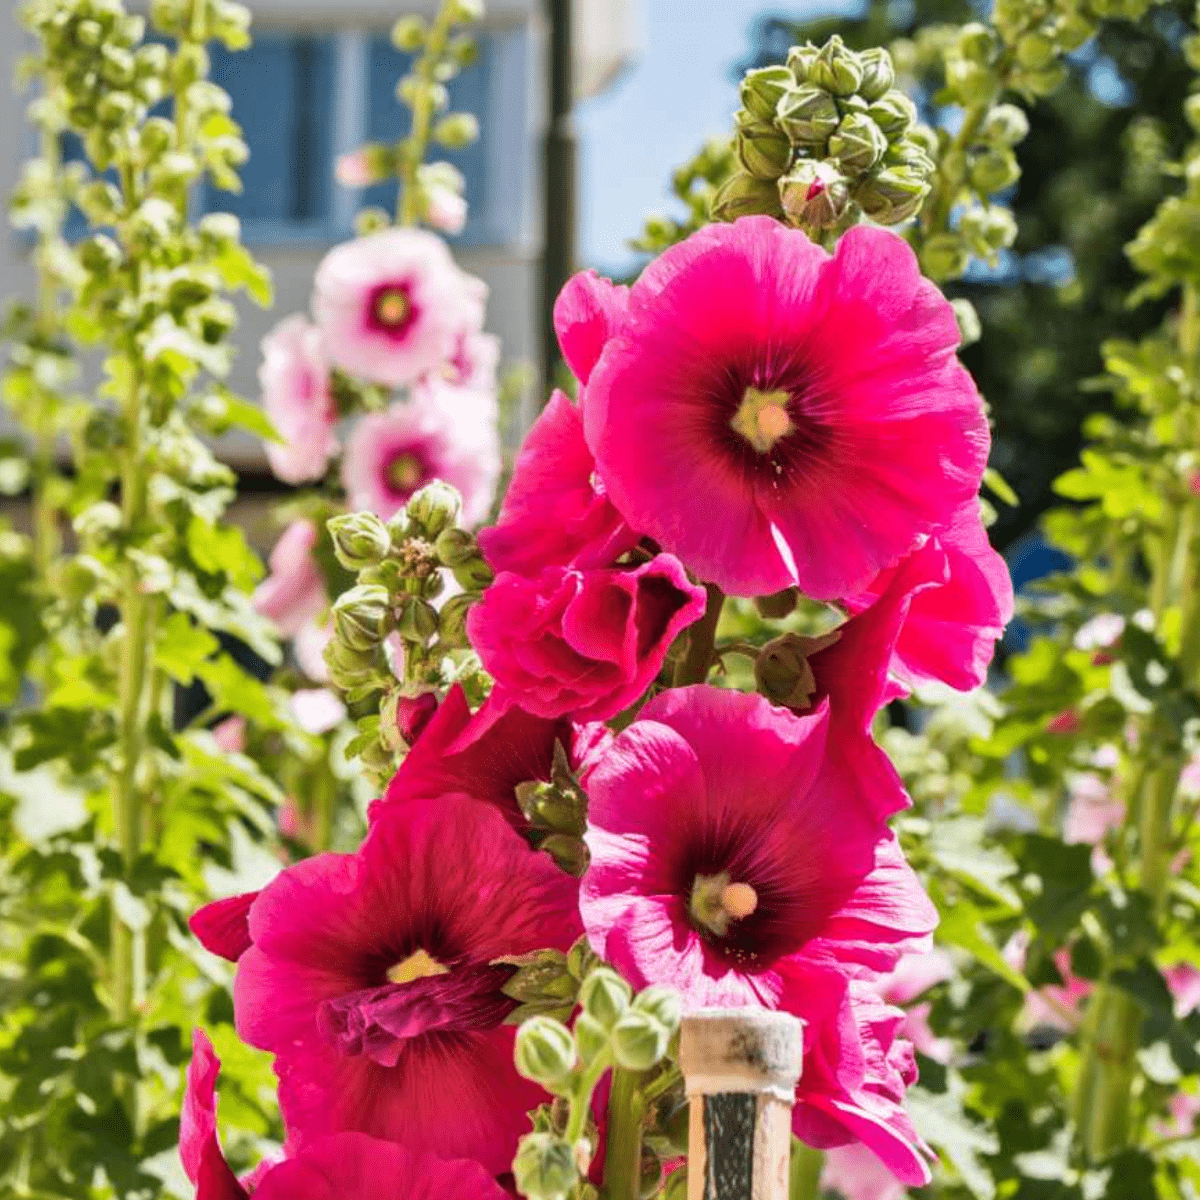
Hollyhock Seeds are beautiful, tall flowering plants that can add a splash of color to any garden. Germinating Hollyhock Seeds can be a straightforward process if you follow the correct steps.
1. Soaking the Seeds
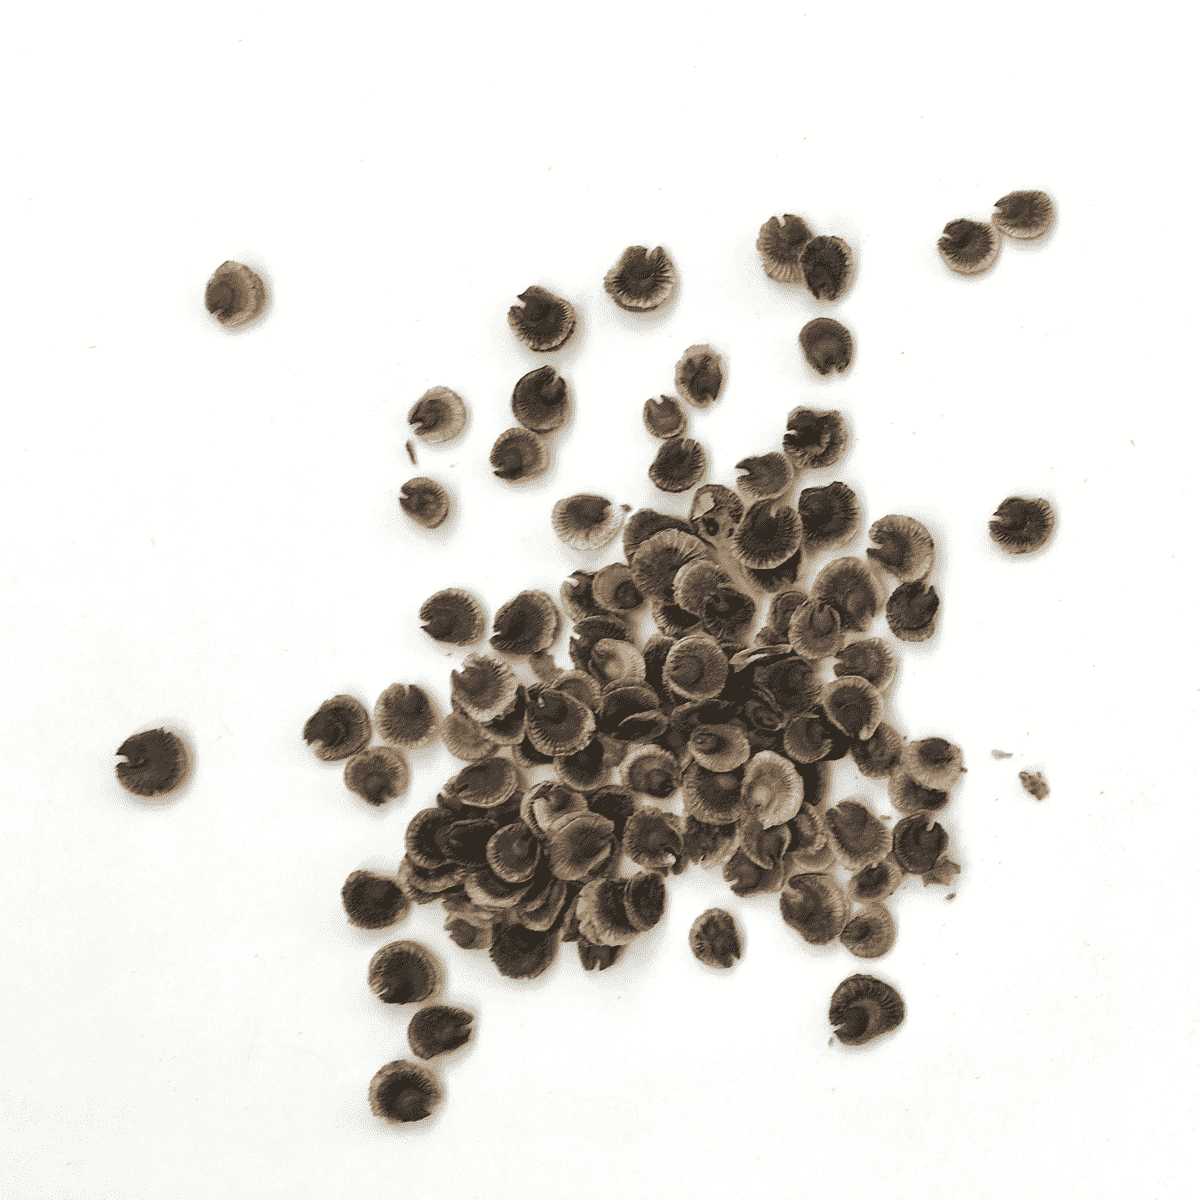
To improve germination rates, it’s recommended to soak Hollyhock Seeds in water for 5-6 hours before planting. This step helps soften the seed coat, allowing moisture to penetrate and kickstart the germination process. Soaking the seeds reduces the germination time and increases the chances of successful sprouting.
2. Preparing the Soil
Hollyhock Seeds prefer well-draining soil that is rich in organic matter. Before planting, prepare the soil by loosening it to a depth of about 12 inches and mixing in compost or well-rotted manure. This will provide the seeds with the necessary nutrients and improve the soil’s structure, promoting healthy root development. If your soil is heavy clay or sandy, amend it with organic material to improve its texture and fertility.
3. Planting the Seeds
After soaking, plant the Hollyhock Seeds directly into the garden or in seed trays if starting indoors. Sow the seeds about ¼ inch deep and space them approximately 12-24 inches apart to give each plant enough room to grow. Lightly cover the Hollyhock Seeds with soil and water gently to settle the soil around them. Hollyhock Seeds need light to germinate, so avoid burying them too deep.
4. Watering
Keep the soil consistently moist but not soggy during the germination period. Overwatering can lead to seed rot or fungal diseases, which can prevent the seeds from sprouting. Water the soil lightly whenever it begins to dry out, being careful not to wash away the Hollyhock Seeds. Once the seedlings emerge, continue to water regularly but allow the top layer of soil to dry out slightly between waterings.
5. Transplanting (If Started Indoors)
If you started the Hollyhock Seeds indoors, transplant the seedlings outdoors after the danger of frost has passed. Choose a sunny location with well-drained soil. Space the plants 12-24 inches apart to allow them room to grow and thrive.
6. Growing Period and Bloom
Hollyhock Seeds are biennial plants, meaning they typically flower in their second year. However, with the right care, you may see blooms in the first year, especially with early planting and ideal conditions. After about 2-3 months of growth, your Hollyhock Seeds will start to produce their stunning, towering flowers. These blooms can last through the summer, providing a beautiful display in your garden.
HOLLYHOCK SEEDS SPECIFICATION
| Common Name | Alcea rosea, Gul khera, Black Holyhock, Double Hollyhock, Gulphaira. |
| Height | 3-6 feet tall. |
| Harvesting Time | 120-150 days. |
| Bloom Time | Mid-summer to early fall. |
| Difficulty Level | Easy to grow. |
GROWING HOLLYHOCK PLANTS IN POTS :
1. Selecting the Right Container:
- Size: Hollyhocks are tall and can grow up to 6-8 feet, so choose a pot that is at least 16-20 inches in diameter and 12-16 inches deep to provide adequate space for root development.
- Material: Opt for sturdy materials like ceramic, terracotta, or heavy-duty plastic to support the plant’s height and prevent tipping over.
- Drainage: Ensure the pot has drainage holes at the bottom to prevent waterlogging, which can lead to root rot.
2. Choosing the Right Soil:
- Soil Type: Use a well-draining potting mix with a blend of garden soil, compost, and perlite or sand. Hollyhocks prefer slightly alkaline soil, so a pH level of 6.0-7.5 is ideal.
- Amendments: Incorporate organic compost or well-rotted manure into the soil to enrich it with nutrients and improve moisture retention.
3. Planting Hollyhock Seeds or Seedlings:
- Timing: Plant hollyhock seeds or seedlings in late spring or early summer after the danger of frost has passed. If starting from seeds, sow them directly into the pot.
- Planting Depth: Sow seeds about ¼ inch deep and cover them lightly with soil. If transplanting seedlings, plant them at the same depth they were in the nursery container.
- Spacing: If planting multiple hollyhocks in a single pot, space them at least 12-18 inches apart to allow room for growth.
4. Positioning the Pot:
- Sunlight: Place the pot in a location that receives full sun, ideally 6-8 hours of direct sunlight daily. Hollyhocks thrive in bright light, which encourages healthy growth and abundant blooms.
- Wind Protection: Since hollyhocks can grow tall, they are susceptible to wind damage. Position the pot near a wall, fence, or other structure that can provide some wind protection.
5. Watering Requirements:
- Frequency: Water hollyhocks regularly, keeping the soil consistently moist but not soggy. Water deeply once or twice a week, depending on the weather conditions.
- Method: Water at the base of the plant to avoid wetting the foliage, which can lead to fungal diseases. Ensure excess water drains out to prevent root rot.
6. Fertilizing the Plants:
- Type: Use a balanced, slow-release fertilizer or a liquid fertilizer with equal parts nitrogen, phosphorus, and potassium (e.g., 10-10-10) every 4-6 weeks during the growing season.
- Application: Apply fertilizer according to package instructions, being careful not to over-fertilize, which can lead to excessive foliage growth at the expense of flowers.
7. Supporting the Stems:
- Stakes: As hollyhocks grow taller, their stems may need support. Insert stakes into the pot early in the growing season and tie the stems to the stakes with soft ties or garden twine to prevent them from bending or breaking.
- Cages: Alternatively, use a plant cage or trellis to provide support, ensuring it is sturdy enough to hold the weight of the mature plant.
8. Pruning and Deadheading:
- Pruning: Trim back any damaged or diseased leaves and stems throughout the growing season to maintain plant health and appearance.
- Deadheading: Remove spent flowers by cutting them off just above the next set of leaves. This encourages the plant to produce more blooms and extends the flowering period.
9. Managing Pests and Diseases:
- Common Pests: Watch for aphids, spider mites, and slugs, which can damage hollyhocks. Use organic insecticidal soap or neem oil to control pests.
- Diseases: Hollyhocks are prone to rust, a fungal disease that causes orange or brown spots on the leaves. Remove and dispose of affected leaves, and avoid overhead watering to reduce humidity around the plant.
10. Overwintering Hollyhocks:
- Preparation: In colder climates, hollyhocks may not survive winter outdoors in pots. Move the pot to a sheltered location, such as a garage or greenhouse, before the first frost.
- Mulching: Apply a layer of mulch, such as straw or leaves, over the soil surface to insulate the roots during winter. Reduce watering frequency, keeping the soil just barely moist.
11. Enjoying Blooms:
- Flowering: Hollyhocks typically bloom in their second year, producing tall spikes covered in large, showy flowers in various colors. The blooms attract pollinators like bees and butterflies.
- Longevity: Hollyhocks are biennials, meaning they complete their life cycle in two years. However, they often self-seed, leading to new plants in subsequent years.
12. Re-potting and Division:
- Re-potting: Every 2-3 years, re-pot hollyhocks into a larger container or refresh the potting soil to provide continued nutrients and room for growth.
- Division: If the plant becomes overcrowded, divide the root ball and replant the sections in separate pots to encourage healthier growth and more blooms.
By following these steps, you can successfully grow hollyhocks in pots, bringing their towering beauty and vibrant colors to your patio, balcony, or garden space.
Additional information
| Weight | 0.1 kg |
|---|---|
| Dimensions | 5 × 5 × 5 cm |
Only logged in customers who have purchased this product may leave a review.






Reviews
There are no reviews yet.